
🟦 For victims, families, or helpers
⚖️ What Rule 39 Actually Is
Rule 39 of the Rules of Court of the European Court of Human Rights (ECHR) Practice Direction: Requests for interim measures allows the Court (not the EU itself) to issue interim measures in urgent cases — usually where there’s an imminent risk of:
- Death,
- Torture or inhuman treatment,
- Irreversible harm (e.g. unlawful deportation, forced return of a child, etc. abduction ).
So, you don’t apply “to the European Union,” but to the European Court of Human Rights (ECHR) in Strasbourg, France, which is part of the Council of Europe, not the EU.
🧾 When to Use Rule 39
You can ask the Court to apply Rule 39 before or while your main human-rights complaint (under Article 34 of the European Convention on Human Rights) is pending. https://r39.echr.coe.int/
Examples:
- A child about to be unlawfully removed or placed.
- A person about to be deported to a dangerous country.
- A medical or detention situation causing immediate, life-threatening risk.
📦 What You Must Send
Your Rule 39 request should be concise but complete, and must include:
- Applicant’s details
- Full name, date of birth, nationality, address, contact info.
- State concerned
- The government you’re complaining against (e.g., United Kingdom).
- Description of the imminent risk
- Explain exactly what will happen and when if the measure is not granted.
- Facts and background
- Relevant decisions of courts or authorities, with dates.
- What you are asking the Court to do
- e.g. “To suspend the transfer of my daughter Emily until the Court examines the case.”
- Evidence
- Attach supporting documents (orders, letters, reports, medical certificates, etc.).
- Signature
- Signed by you or your lawyer.
📬 How to Submit
Rule 39 requests must be sent electronically or by fax, not by email, and marked URGENT – Rule 39 Request.
Send to:
The Registrar
European Court of Human Rights
Council of Europe
F-67075 Strasbourg-Cedex
France
Fax: +33 (0)3 88 41 39 00
✅ Submitting a Rule 39 request online (ECHR only)
Many people on apple have expressed difficulty in obtaining their case files from email on the Apple device
⭐ STEP 1 — Tell them EXACTLY what to tap to find the attachment
How to locate and upload your files on Apple Device or Phone.
1. Open the email
2. Scroll down to find the attachment
3. Tap the attachment ONCE
It will open on the screen.
This is where EVERYONE gets stuck next — they think “open” means “saved.”
But on iPhone, it is NOT saved.
⭐ STEP 2 — Tell them how to actually SAVE the file
This is the step they never guess:
1. While the file is open, tap the share button
(it’s a small square with an arrow pointing up)
2. A menu appears
Scroll the menu upwards if needed.
3. Tap “Save to Files”
THIS IS THE SECRET.
If they don’t press Save to Files, the upload system CANNOT FIND the file.
4. Tap “On My iPhone”
NOT iCloud
NOT Recently Deleted
NOT Downloads
NOT anywhere else
5. Tap Save
Now the case file is really saved.
⭐ STEP 3 — Explain exactly how to upload it to any website
Tell them:
1. Go to the upload page
2. Tap “Choose File” or “Upload”
3. Tap Browse
(if they see “Photo Library,” tell them to ignore that)
4. Tap On My iPhone
(THIS is where the file went)
5. Tap the file
6. Upload will now work
Done.
How to locate and upload files on an Android Phone or computer.
1. Open the email
2. Scroll down to the attachment
3. Tap the attachment ONCE
They should see a little download icon (↓) or “Download” button.
⭐ STEP 2 — Download the attachment properly
Android makes this easy.
1. Tap Download
The file will save automatically.
2. It usually goes to:
📁 Files → Downloads
(or My Files → Downloads on Samsung)
This is MUCH easier than iPhone.
⭐ STEP 3 — Help them find the downloaded file
Tell them to:
1. Open the Files app
(This might be called “Files,” “My Files,” or “File Manager.”)
2. Tap Downloads
Here they will see:
- PDFs
- DOCX
- Images
- Letters
- Evidence
- Court papers
Everything they downloaded.
If the file isn’t there, it will be in:
📁 Files → Recent
⭐ STEP 4 — Uploading the file to a website
This is where people usually panic — but Android makes it simple.
Tell them:
1. Go to the website that wants the upload
2. Tap “Choose File” or “Upload”
3. A menu appears
Choose Files or Documents
(NEVER choose “Photos” unless uploading a picture)
4. Tap Downloads
5. Tap the file you want
6. Upload completes
Done.
⭐ STEP 5 — If they need to move or rename files
Tell them to:
1. Open Files
2. Long-press the file
3. Choose Move or Rename
4. Put it into a folder you create, such as:
📁 Court
📁 Police
📁 Social Services
📁 Medical
📁 Legal
📁 Housing
📁 Evidence
Android lets them organise everything.
⭐ STEP 6 — If they can’t open PDFs or DOCX
Tell them to install:
- Google PDF Viewer (free)
- Microsoft Word (free)
These open 99% of files.
⭐ STEP 7 — If they are using Gmail
Gmail hides the downloads unless you guide them:
1. Tap the attachment
2. Tap the download icon
3. Tap the three dots → “Download again”
4. File appears in Downloads
⭐ Android Summary (simple version to tell people)
“Open the email → tap the attachment → tap Download → open Files → open Downloads → upload from there.”
That’s all they need.
Since 2022 the Court allows electronic filing via its secure eComms system, but you must first create a formal application or https://www.echr.coe.int/documents/d/echr/application_form_eng urgent request.
Here’s the process:
- Go to:
🔗 https://www.echr.coe.int/applicants or help desk https://echrservices.helpdesk.echr.coe.int/ to sign in

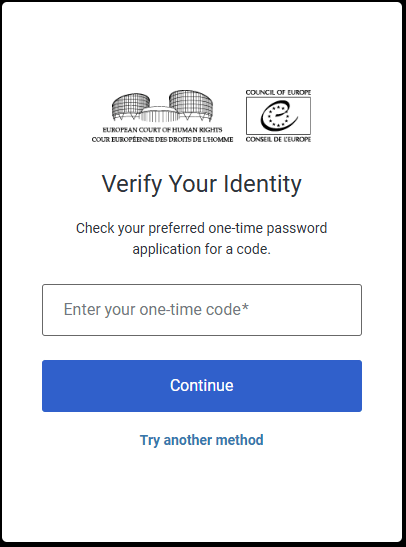
Once you have supplied your email. You will need the use of an Authenticator such as Google Authenticator to sing n in this provides secure sign into the EHCR this authenticator can be downloaded from Play on Google android
🪪 Step-by-Step Guide
i) Wait for your eComms invitation
- You’ll receive an email from the Court (from an
@echr.coe.intaddress) once they open your case file. - The email contains a link to activate your eComms account.
ii)Install an Authenticator app
- On Android: open Google Play Store → search for “Google Authenticator” → Install.
- On iPhone: open App Store → search for “Google Authenticator” or “Microsoft Authenticator”.
iii) Scan the QR code Yes, we know you cannot do this on your own phone
- When you click the activation link, the ECHR page shows a QR code.
- Open your Authenticator app → tap Add Account → Scan QR Code.
- The app will then display a 6-digit code that changes every 30 seconds.
iv) Enter the 6-digit code
- Type that code on the ECHR login page.
- This completes the secure sign-in.
v) Upload or view documents
- Once inside eComms, you can upload PDFs, check Court messages, or receive interim-measure decisions. You should really upload all your case files and a covering letter which we can help you with.
- All communications are encrypted and time-stamped.
vi) Click “Apply to the Court” → “Interim measures (Rule 39)”.
It shows two options:
- Lawyers with eComms credentials can upload directly.
- Individuals without an account must send the form by email to the Court’s special inbox used only for Rule 39 requests.
vii) Prepare the “Request for Interim Measure (Rule 39)” form.
You can download it there. It asks for:
- Your personal details
- The government concerned
- The urgent risk (e.g. deportation tomorrow, imminent harm to a child, etc.)
- The measure you request
- Evidence and attachments (PDFs or photos)
- Send it by email to:
📧 interim.measures@echr.coe.int
(This address is only for urgent Rule 39 requests — not general complaints.)
Use the subject line:URGENT – Rule 39 Request – [Your Name] v. [State] - The Court will acknowledge receipt and may ask you to create an eComms account to exchange further documents securely.


Leave a comment